Adding external resources
Adding a file reference
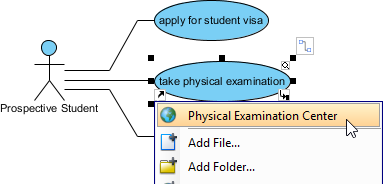
- Move the mouse over a shape to add reference, click the resource icon References and select Add File… from the pop-up menu.
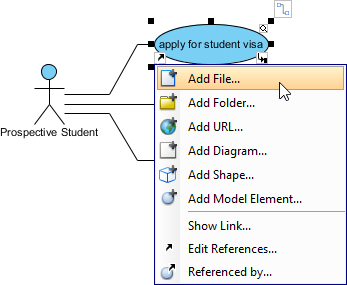
- In the Select File window, select the file(s) to reference to and click OK. Multiple file selection can be made by pressing Ctrl or Shift key. You may also enter the description for the file in Description field.
Adding a folder reference
- Move the mouse over a shape to add reference, click the resource icon References and select Add Folder… from the pop-up menu.
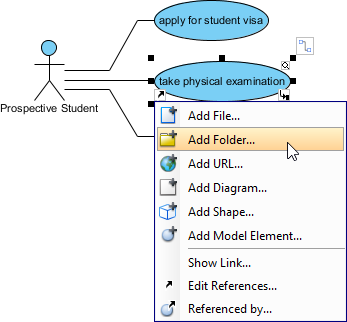
- In the Select Folder window, select the folder to reference to and click OK. Multiple folder selection can be made by pressing Ctrl or Shiftkey. You may also enter the description for the folder in Description field.
Adding a URL reference
- Move the mouse over a shape to add reference, click the resource icon References and select Add URL… from the pop-up menu.
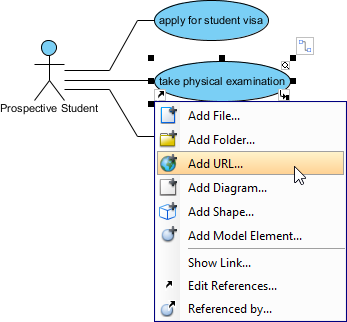
- In the Add URL window, enter the URL, a brief description as its name and click OK. You may also enter the description for the URL in Description field.
Adding internal resources
Reference to diagrams
- Move the mouse over a shape, press its resource icon References and select Add Diagram… from the pop-up menu.

- In the Select Diagram window, select the diagram(s) to reference to and click OK. You may also enter the description for the diagram references in Description field.
Diagram Type vs Diagram Hierarchy view
The gear button at the top left of the Select Diagram window allows you to click on it to select a diagram view, either Diagram Type or Diagram Hierarchy. For Diagram Type view, diagrams are grouped by the types they belong to. For Diagram Hierarchy view, diagrams are grouped based on the model hierarchy. For example, if business process diagram D1 contains a sub-process S1, and S1 contains another diagram D2 as sub-diagram. By choosing Diagram Hierarchy view, you will see D2 appeared as a child node of D1.
Adding a shape reference
- Move the mouse over a shape, press its resource icon References and select Add Shape… from the pop-up menu.
- In the Select Shape window, select the shape(s) to reference to and click OK. You may also enter the description for the shape references in Description field.
Adding a model element reference
- Move the mouse over a shape, press its resource icon References and select Add Model Element… from the pop-up menu.
- In the Select Model Element window, select the model element(s) to reference to and click OK. You may also enter the description for the element references in Description field.
Opening a reference
Move the mouse over a shape to open reference, click the resource icon References and select an external resource from the pop-up menu.
If you select a URL reference to open, it will be opened by default web browser. If you select a file reference to open, it will be opened by your system with the program used to open this kind of file. If you select a folder reference to open, it will be opened by your system automatically.
If you select a shape to open, it will switch to the diagram where the shape belongs to and the shape will be selected by filled-selector. If you select a diagram to open, it will switch to the selected diagram immediately. If you select a model element to open, it will open the specification of that model element.
Editing references
- Move the mouse over a shape and press it resource icon References and select Edit References… from the pop-up menu.
- When the specification window pops out, double click on the row of reference you want to enter its description or modify it.
- Enter the description or modify it under Description column.
- Finally, press Enter to confirm editing.
Removing a reference
- Move the mouse over a shape which has references, click its resource icon References and select Edit References… from the pop-up menu.
- When the specification window pops out, select a reference to be removed on the list and press Remove button to delete the selected reference.
- Finally, click OK button to confirm the reference removal.
Diagram-Based Reference Mapping Editor
You can add reference material such as an external file, a folder, a URL or even a model element or diagram to your design. If you use ‘reference’ frequently in your design, the coupling between your design and the referenced ‘things’ will be increased over time, making it uneasy to manage those references, nor to trace the usage of referenced material.
The Reference Mapping editor provides you with an overview of references added to a design. It is a diagram-based editor that lists the diagram itself and the containing elements on one side, and the referenced material on the other side, with mapping connectors linking between the model data and referenced material. With the Reference Mapping editor you can have a big picture of references used. You can also add new references, or to edit existing references.
Opening the Reference Mapping Editor
To open Reference Mapping editor from a diagram, right click on the background of the diagram and select Reference Mapping from the popup menu.
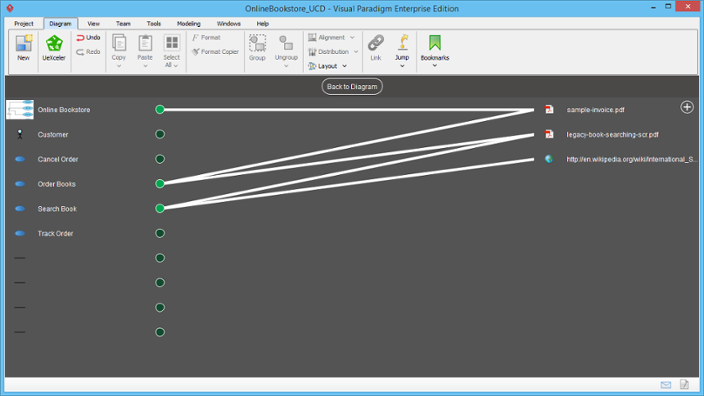
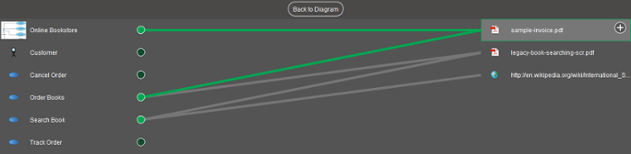
Understanding the Reference Mapping Editor
The Reference Mapping editor consists of three main parts:
- Model Data – The diagram from which you open the Reference Mapping Editor as well as its containing diagram elements are listed on the left hand side.
- References – The file, folder, URL, diagram, shape and model element being added to any model data as references are listed on the right hand side. You can add extra reference material manually if you want to add references. For details, read the next section.
- Reference Mapping – References between model data and reference material are represented by mapping connectors that appear on the middle of the editor.
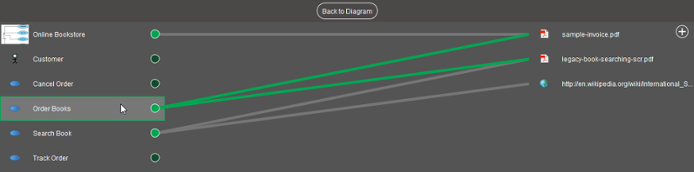
Knowing the reference material added to a model element
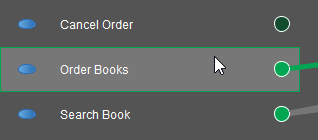
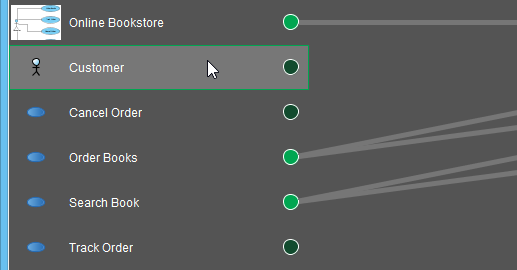
If you want to know the reference material added to a model element, click on the model element on the left hand side. Its references will be highlighted in green.
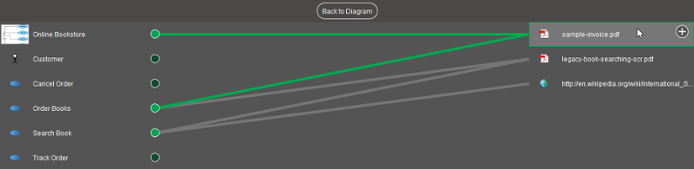
Knowing the utilization of a piece of reference material
If you want to know the utilization of a piece of reference material, click on the reference material on the right hand side. The elements that reference the selected reference material will be highlighted in green.
Adding a reference
To add a reference to model data:
- Select the model data on the left hand side. If you want to add reference to multiple items, press Ctrl or Shift for a multiple selection.
- Hold your mouse button and drag to the target reference material for creating a reference.
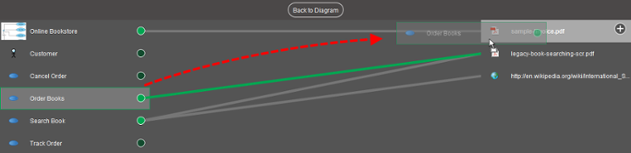
- Release the mouse button to create the reference. You will see a connector added between the selected model data and reference material.
Adding a reference material
You may want to add reference to a material that is not currently listed on the right hand side. In such case, you have to add the material manually first, and then add reference. To add a reference material:
- Click the add button at the top of the reference material list on the right hand side.
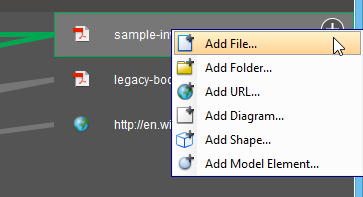
- Select the kind of material to add from the popup menu.
- Confirm your choice.
Re-ordering model data and reference material
You can re-order model data and reference material to reduce the amount of crossing between mapping connectors. To re-order model data and reference material:
- Select the model data or reference material. You can press Ctrl or Shift for a multiple selection.
- Drag your selection to the desired position within the list.
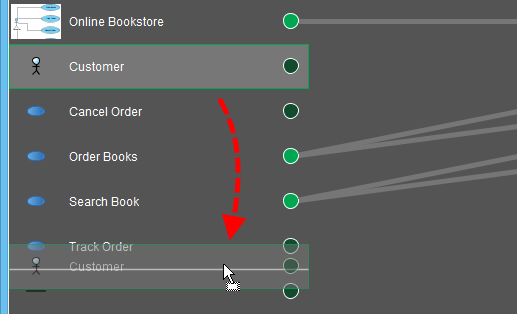
- Release the mouse button.
Deleting references
To delete a reference, select it and press the Delete key to delete it. Again, you can delete multiple references at a time by pressing Ctrl or Shift key to select multiple references.