Implementation Plan is a project management tool that shows how a software project will evolve at a high level. When properly developed, an implementation plan ensures that development team are working to deliver works that meet the customers’ needs in time.
An implementation plan can serve many purposes:
- A communication tool used when building consensus with project stakeholders regarding the delivery date of works.
- A calendar for the team to follow
- Estimation and validation of project plan – Ensure works will be delivered in time.
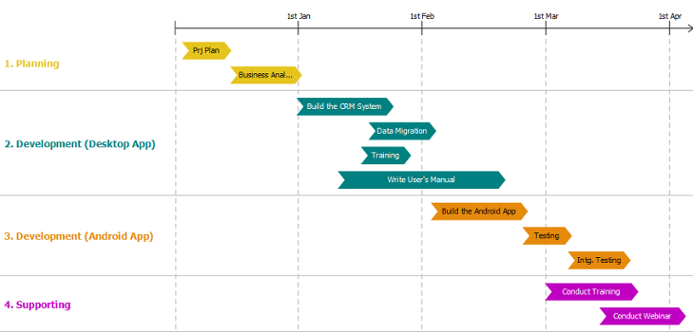
The figure above shows an example of implementation plan that shows the major, high level development activities in a software project. It consists of three major components:
- Timeline: A linear representation of time.
- Lane: A lane organizes and categorizes activities into a group associated with a concept such as a phase or a person. Each lane can contain multiple (activity) bars.
- Bar: A major activity. The left and right edge of each bar indicates the planned start and end date of that piece of activity.
Creating an implementation plan
- Select Diagram > New from the application toolbar.
- In the New Diagram window, select Implementation Plan Diagram.
- Click Next.
- Enter the name and description. The Location field enables you to select a model to store the diagram.
- Click OK. This creates an implementation plan with two default lanes. You can rename the lanes and add your own ones. Then fill in the plan with bars.
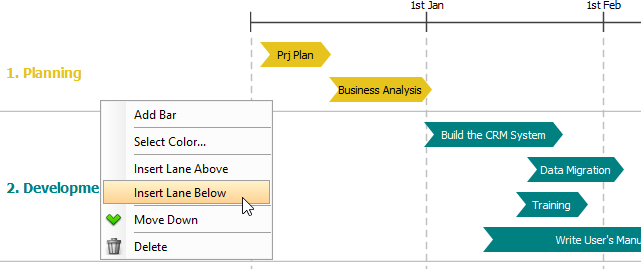
Inserting a lane
A lane must be created by inserting above or below an existing lane. To insert a lane, right click on the existing lane and select Insert Lane Above or Insert Lane Below from the popup menu.
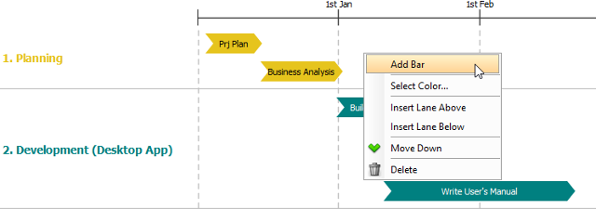
Creaing a bar
A bar is contained by a lane, while a lane can hold multiple bars. To create a bar:
- Right click on the background of a lane and select Add Bar from the popup menu.
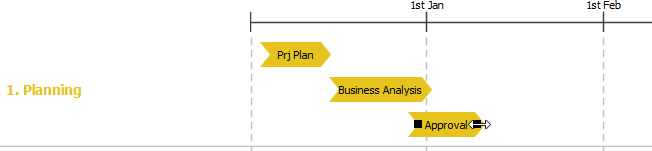
- Enter the name of the activity.
- Press Enter to confirm the name.
- Position to bar to reflect its start and end date. To do this, drag the bar left or right. Press on the resize handler on the left or right to adjust its width.
Changing the lane and bar color
There is a color code assigned to each lane, which affects the color of lane caption and the bars within the lane. To change the lane color, right click on the lane and select Select Color… from the popup menu. Then select the color you want.
By default, the bars in a lane share the same color with the lane. If you want a different color for a bar, right click on that bar and select Color > Custom… from the popup menu. Then select the color you want.