In order to develop a truly functional information system, features must be designed and developed based on users’ business needs with behaviors following the business rules strictly. Decision table provides a compact way to represent complicated business rules. Thanks to the easy-to-comprehend layout, Decision Table can be understood by developers and end-users easily.
Decision table involves three sections – conditions, actions and rules. From developer’s point of view, Decision Table is pretty much like the tabular form of an if-then-else statement. While business users use Decision Table to document business rules, system developers study a Decision Table to think about the right way to implement those rules.
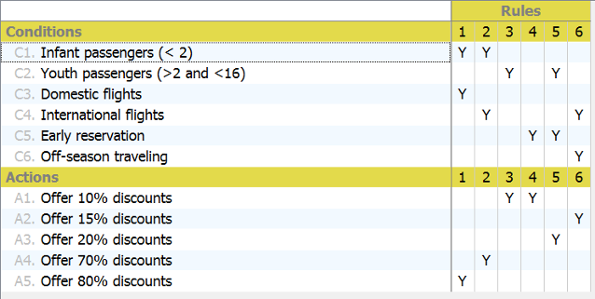
The condition rows in a Decision Table list out the factors that can influence the final decision. The action rows list out the possible operations to perform. Each of the rule columns represents a combination of condition(s) and action(s), meaning that when one or more conditions are met, action or multiple actions will be performed accordingly. Decision table does not enforce any rule regarding to the way cells are filled. Although people usually use simple true/false (or simply T/F, Y/N) values to represent the matching of conditions and actions, some prefer using ticks. There is real limitation though.
Creating Decision Table
- Select Diagram > New from the application toolbar.
- In the New Diagram window, select Decision Table.
- Click Next.
- Enter the diagram name and description. The Location field enables you to select a model to store the diagram.
- Click OK.
Creating conditions and actions
The first two buttons in the toolbar at the top of the Decision Table allows you to create conditions and actions respectively. By selecting an existing condition or action and click on the create button, a new condition/action will be inserted after the selected condition/action. Then, enter the description of condition/action. Alternatively, you can right click on a condition/action and add a new one after it via the popup menu.

Creating rules
The third button in the toolbar at the top of the Decision Table allows you to create rules. By selecting an existing rule and click on the create button, a new rule will be inserted after the selected rule. Find the conditions and actions that match your rule. Double click on the corresponding cell and place a mark on it. For example, enter “Y” to indicate “Yes”. Alternatively, you can right click on a rule and add a new one after it via the popup menu.

Reorder conditions, actions and rules
To reorder conditions and actions, select them in the table and click on the Move Up/Down button in toolbar or right click on them and select Move Up/Down from the popup menu. To reoder rules, select and right click on them, select Move Left/Right from the popup menu.
Delete conditions, actions and rules
To delete conditions, actions and rules, select the rows or columns to delete, click on the Delete button in toolbar.