You can set colors to mind map nodes to represent different kinds of idea and concepts. You can also set icon(s) to a node to represent the nature of a node, such as a telephone icon for concepts related to contacting some body.
Changing the line, fill or font style of node
- Select the node(s) that you want to format. Multiple node selection can be made by a range of selection or by pressing the Ctrl key and select the nodes subsequently.
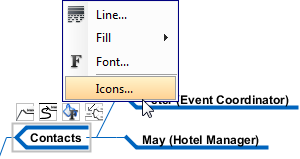
- Move the mouse pointer to a node within the selection. Click on the Format resource icon.

- Select either Line…, Fill… or Font… from the popup menu to change specific type of format. (Read the coming sub-sections for details about line, fill and font settings)
Once you have confirmed your selection, your choice will be memorized. When you want to apply the settings on other nodes, you can select the new nodes, re-open the same popup menu and select the setting through the popup menu.
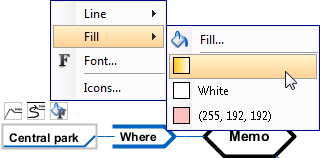
Line
Line settings control the appearance of border around node(s). You can adjust the style (e.g. dash, solid), the weight, which is the thickness of line, the color and the level of transparency.

Fill
Fill settings control the background color of node(s). You can apply solid and gradient colors as well as to control the transparency.

Font
Font settings control the font style, size, type and color of text appear on a node.

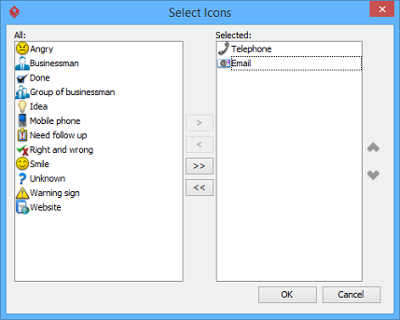
Changing icon of node
Select the node(s) that you want to set icon. Multiple node selection can be made by a range of selection or by pressing the Ctrl key and select the nodes subsequently.
- Move the mouse pointer to a node within the selection. Click on the Format resource icon, then select Icons… from the popup menu.
- In the Select Icons dialog box, select the icon to set and click > to assign it to the node(s). Click OK to confirm.