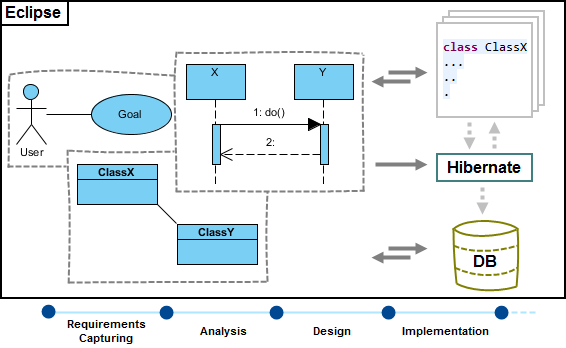
Visual Paradigm enables you to integrate the visual modeling environment with Eclipse, providing full software development life cycle support. By designing your software system in Visual Paradigm, you can generate programming source code from class diagram to an Eclipse project. Also, you can reverse engineer your source code into class models in Visual Paradigm.
Installation
First of all, please make sure you have Eclipse 3.5 or above available. To install Eclipse Integration from Visual Paradigm:
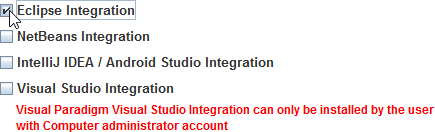
- In Visual Paradigm, select Window > Integration > IDE Integration… from the toolbar.
- Select Eclipse. You can run Visual Paradigm in multiple IDEs. In other words, if you need you can select multiple IDEs here. Click Next.
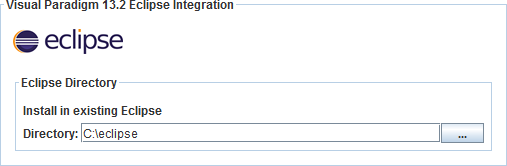
- Specify the folder path of Eclipse. Click Next to start copying files to your IDE.
Notes:
- Eclipse integration can only be installed on one Eclipse directory only.
- The installation process will modify/add files under your IDE installation directory. For Windows user, you may need to run Visual Paradigm as administrator in order to allow it to run through the installation process with the required permission. To run Visual Paradigm as administrator, right click on its executable in the bin folder or its shortcut and select Run as Administrator to start it up.
Un-Installation
To remove the installation with an integrated IDE, perform an uninstallation.
- In Visual Paradigm, select Window > Integration > IDE Integration… from the toolbar.
- Select the radio button Uninstall.
- Select Eclipse Integration.
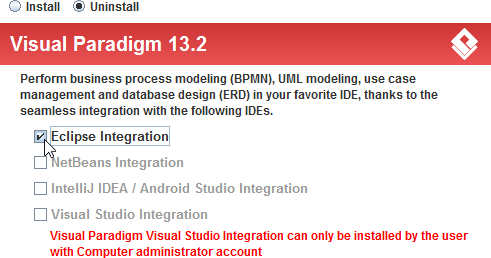
- Click Next.
- Click Next for file removal.