You can prevent a model element or a diagram from being edited by locking it.
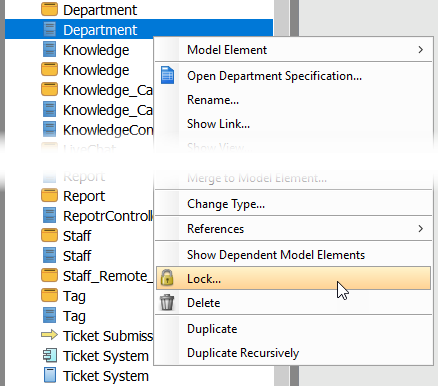
Locking a model element
- Open the Project Browser by selecting View > Project Browser from the application toolbar.
- Locate the model element that you want to lock. You can search it by entering its name in the Search box at top right, or find it under the Model Structure tab.
- Right click on the model element and select Lock… from the popup menu.
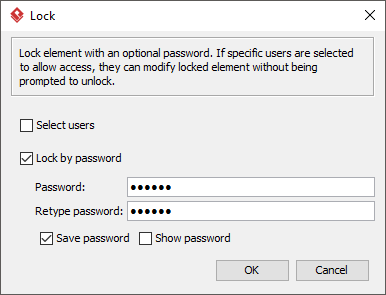
- In the Lock window, enter the password and click OK to confirm. You may also lock an element without entering password, but then other people will be able to unlock it right away without entering a password.
Locking a diagram
- Diagram can be locked both via the diagram editing interface and in Project Browser. To lock an opened diagram, right click on its background and select Diagram Content > Lock… from the popup menu. To lock a diagram in Project Browser, open the Project Browser by selecting View > Project Browser from the application toolbar first. Then, locate the diagram either by searching or by selecting it under the Diagrams tab. Right click on the diagram and select Lock… from the popup menu.
- In the Lock window, enter the password and click OK to confirm. You may also lock a diagram without entering password, but then other people will be able to unlock it right away without entering a password.
Unlocking
If you want to edit a locked element you have to either unlock it or remove the lock completely. Unlock makes an locked item become editable within the session. By reopening the project, the unlocked elements item will become locked again.
Unlock can be done intentionally by passive when you attempt to edit a locked model element/diagram. To unlock an item manually, run through the steps of locking until you see the popup menu showing Unlock instead of Lock. Select it. If the lock had password protected, enter the password and click OK. Note that if you are the one who created the lock, you won’t be asked for a password.
When you attempt to edit a locked item, you will be prompted to unlock it, too.
Removing a lock
To remove a lock completely, run through the steps of locking until you see the popup menu showing Configure Lock… instead of Lock. Select it. In the Configure Lock window, select Remove lock, enter the password and confirm. Note that if you are the one who created the lock or if no password has been specified, you won’t be asked for a password.
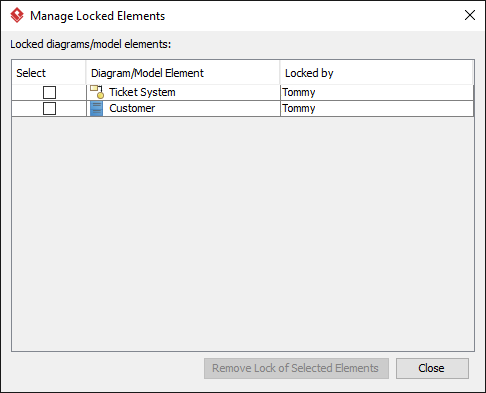
Manage locked elements
You can view all the locked items as well as to remove their locks in the Manage Locked Elements window. To open the window, select Window > Configuration > Manage Locked Elements from the application toolbar.