In team collaboration, ‘commit’ refers to the process of uploading local modifications to the server. As team members make changes in a project, they can share their works by committing those changes to the server. By committing, changes are merged from working copy to server copy. During merging, a conflict may be caused when there is a contradiction between team members. Decision have to be made whether to keep the current modified copy (i.e. overwrite) or to accept others’ copy (i.e. revert). All conflicts have to be solved before proceeding to commit. To commit changes:
- Select Team > Commit from the toolbar.
- If the change you made contradicts the change made by another team member, this will result in a conflict. You must resolve all the conflicts in order to continue. For details, read the Resolving conflicts section below. Clear the conflicts, if any, and continue.
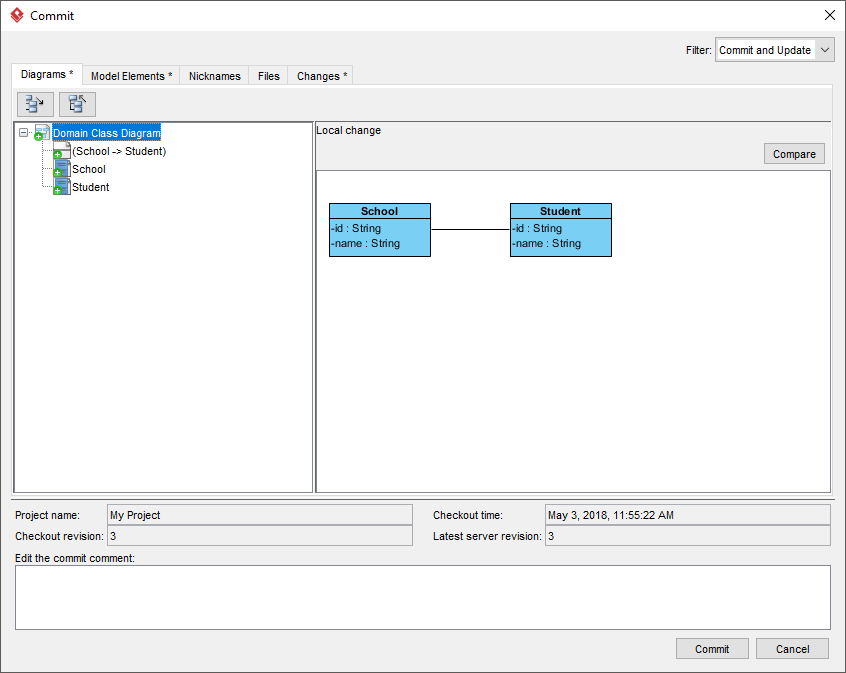
- The Commit window displays the changes to be committed to the server. Click Commit to proceed.
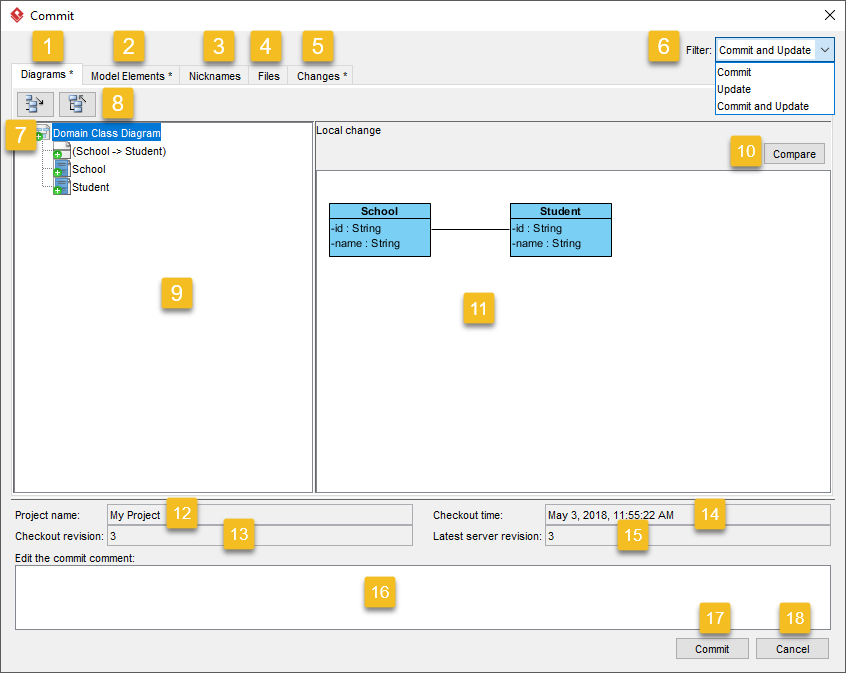
Overview of Commit window
| No. | Name | Description |
|---|---|---|
| 1 | Diagrams tab | The diagram level changes to be performed when you execute commit. |
| 2 | Model Elements tab | The model element level changes to be performed when you execute commit. |
| 3 | Nicknames tab | The changes of nickname to be performed when you execute commit. |
| 4 | Files tab | The file changes to be performed when you execute commit. |
| 5 | Changes tab | All the changes to be performed when you execute commit. |
| 6 | Filter | When you commit, local changes will be merged to the server copy and meanwhile, changes in server copy will be merged to the local copy, too. The filter allows you to filter the tree on the left hand side to list the commit changes, which are changes to perform on server copy, and/or update changes, which are changes to perform on local copy. |
| 7 | Expand All | Expand the tree nodes in the tree below. |
| 8 | Collapse All | Collapse the tree nodes in the tree below. |
| 9 | Tree | List out the changes to be performed when you execute commit. |
| 10 | Compare | Click this button to compare local and server copy side by side. |
| 11 | Preview | The preview of the element as selected in the tree on the left hand side. |
| 12 | Project name | Name of current project. |
| 13 | Checkout revision | The number of current checkout revision. |
| 14 | Checkout time | The time for latest checkout. |
| 15 | Latest server revision | The number of latest revision in the server. |
| 16 | Commit comment | You can give a comment for your current commit by typing here. |
| 17 | Commit | Proceed committed |
| 18 | Cancel | Cancel committing and close the window. |
Committing multiple projects
Instead of commtting a single project, you can commit multiple project files at the same time, for those listed in the Teamwork Client window as managed projects.
- Select Team > Utilities > Open Teamwork Client… from the toolbar.
- From the list on the left hand side, select the projects to commit.
- Right click on the selection and select Commit… from the popup menu.
Resolving conflict
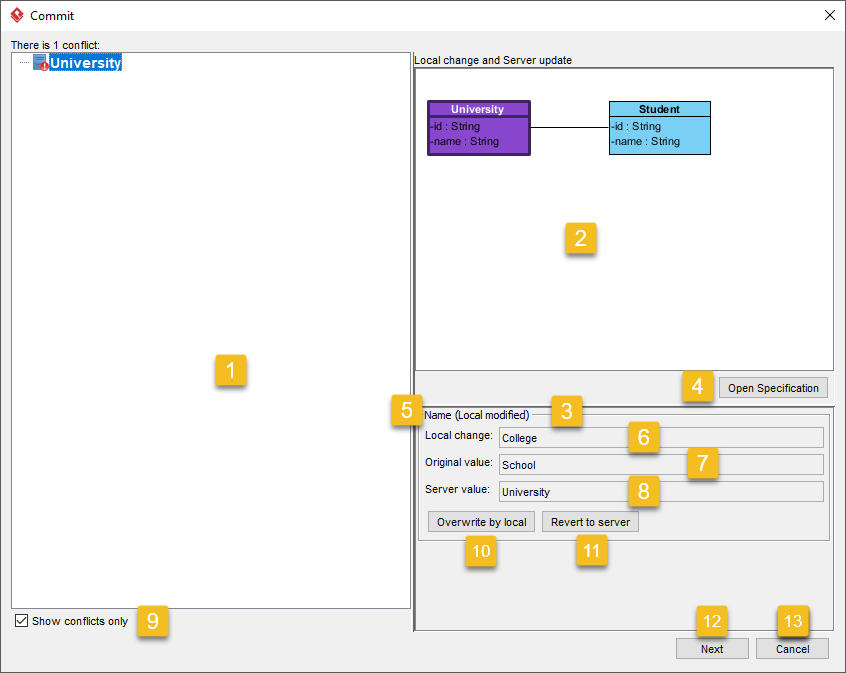
If the change you made contradicts with the change made by another team member, this will result in a conflict. For example, your colleague has renamed a class from School to University and performed a commit, and then you rename the same class to College and perform a commit. This produces a conflict.
When a conflict occur, you must resolve it in order to continue committing. You have to resolve conflict either by overwriting or reverting the change. Overwrite means to adopt the server copy’s change, while Revert means to adopt the local’s change.
| No. | Name | Description |
|---|---|---|
| 1 | List of change (action) | List of changes to be performed. Initially only conflicted changes are listed. You can uncheck Show conflicts only to list all changes. |
| 2 | Preview | The preview of the element as selected in the tree on the left hand side. |
| 3 | Conflicted properties | The properties that cause conflicts are listed in this panel. |
| 4 | Open Specification | Click on this button to open the specification of element selected in the tree on the left hand side. |
| 5 | Property name | The names of conflicted properties. |
| 6 | Local change | The value of property in local project copy. |
| 7 | Original value | The value of property before changed. In other words, it is the value in checkout copy. |
| 8 | Server value | The value of property in server project copy. |
| 9 | Show conflicts only | Check it to list only conflicted changes in the tree on the left hand side. Uncheck it to list all changes. |
| 10 | Overwrite by local | Click on this button to adopt the source copy. |
| 11 | Revert to server | Click on this button to adopt the target copy. |
| 12 | Preview | Click this button to continue committing. |
| 13 | Cancel | Cancel committing and close the window. |
Committing a part of a project
In addition to committing all the changes you have made within the session, you can commit change(s) made on specific model element(s), shape(s) or diagram(s). This way of committing is called a partial commit. To work with partial commit, simply right click on the project data you want to commit and Team > Commit from the popup menu. You may select multiple items (e.g. two shapes) and commit them at once.