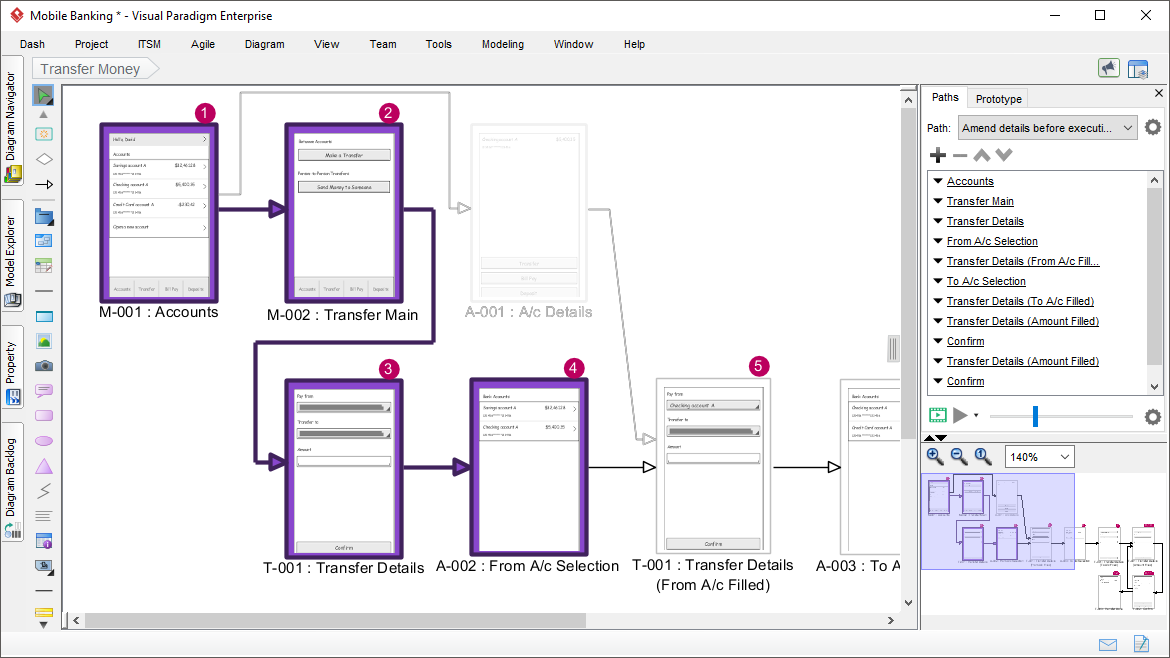
The wireflow animation tool makes your wireflow alive by presenting how the scenes of a flow are being navigated, in the form of an animation. The animation helps stakeholders and team members know how an end user will interact with the system to achieve a goal, making it an ideal communication tool to use in clarifying and confirming system functionality and behaviors.
Creating a path
As long as an interaction involves alternate and exceptional cases, there are multiple paths of wireflow that can be navigated. To play an animation, you have to first create the path(s) to navigate. To create a path:
- The Paths panel is where you create, manage and animate paths. The panel is opened by default. If it’s closed, open it by right clicking on the background of the wireflow diagram and selecting Edit Paths… from the popup menu.
- Click on the gear button next to the drop-down menu of Path, and then select Add Path.
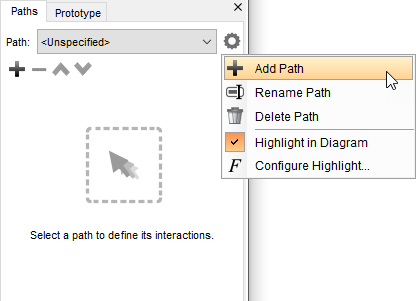
- Enter the name of the path. The name will be used to identify the path. It is recommended to enter a short yet specific description that can uniquely identify the path to navigate.

- Click OK to confirm.
- An empty path is created. Add scenes into the path. Click on the + button at the top of the Paths panel.
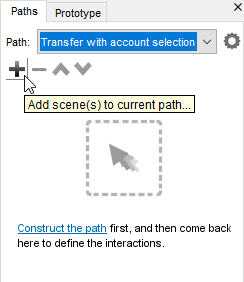
- Click on a scene on the diagram to it into the path.
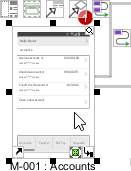
- Repeatedly add the other scenes into the path, following the order they are presented in the path. The scenes added will be listed in the Paths panel , and are numbered in the diagram based on their order in the list.
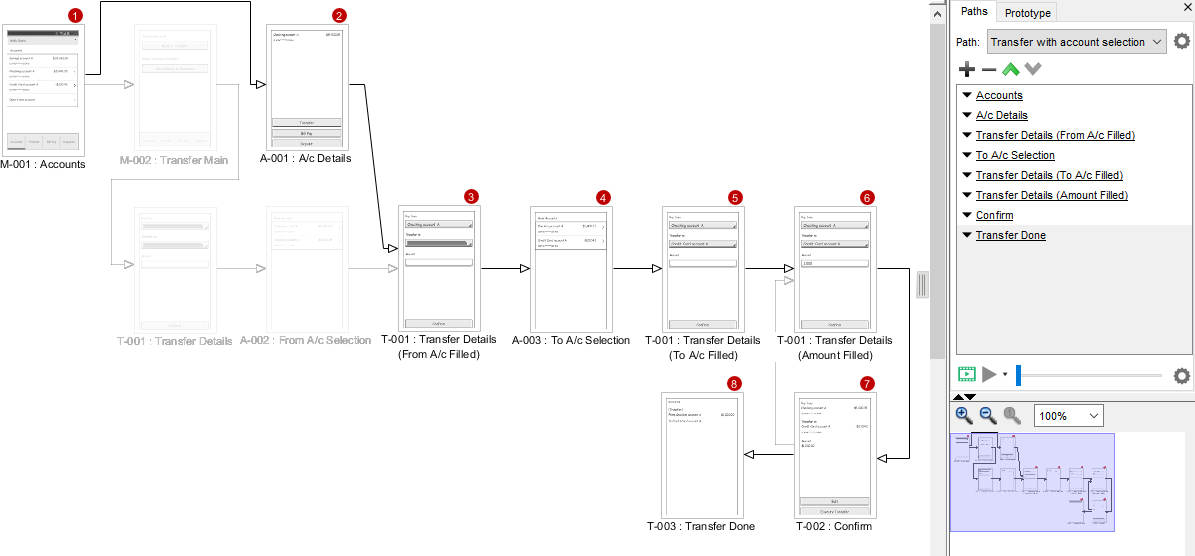
- When all scenes are added, click End Path to quit from scene selection.

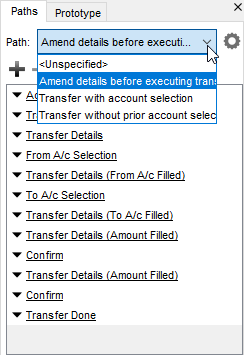
As said, a typical wireflow presents not just a single but multiple navigation paths. You can create the other paths by re-performing the steps above. You can switch to another path by choosing the path to open from the drop-down menu at the top of the Paths panel.
Animating a path
To present a navigation path in the form of animation:
- From the top of the Paths panel, select the path to animate. If the Paths panel is not opened, right click on the background of the wireflow diagram and select Edit Paths… from the popup menu to open it first.

- In the Paths panel, click the play button to run the animation. You may adjust the zoom ratio by selecting selecting a zoom ratio to play with. If you want a more clear picture on the scene content, select a higher zoom ratio.

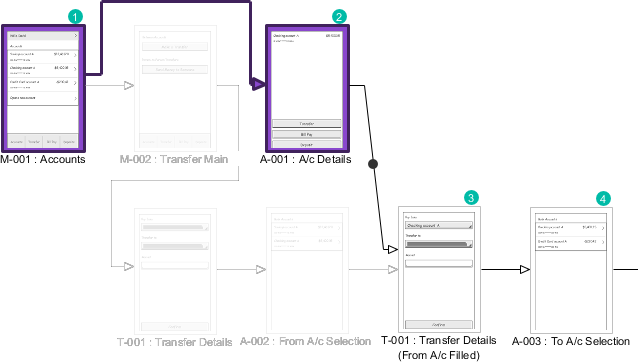
When the animation begins, a tiny black dot will be attached to the beginning of the path selected to animate. During the animation, the black dot will traverse through the path. Scenes that lie on the path will be painted in purple one by one when being approached by the black dot until the black dot reached the end of the path.
Play the animation as a storyboard slideshow
Besides animating a path in the wireflow diagram, you can also play the wireframes one by one as a storyboard slideshow. You can stay at a slide, navigate around the wireflow back and forth as you like. This facilitates deeper discussions on UX, which is particularly useful when people want to spend a bit more time on one or more scenes, or skip through some of them in the wireflow path.
To animate a path as storyboard slideshow:
- From the top of the Paths panel, select the path to animate. If the Paths panel is not opened, right click on the background of the wireflow diagram and select Edit Paths… from the popup menu to open it first.
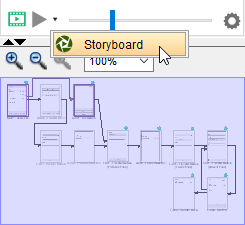
- Click on the tiny triangle next to the Play button and select Storyboard from the drop-down menu.
- This opens the storyboard slideshow player. Navigate through the scenes by clicking on the Next and Previous button at the bottom left of the player, or press the Left or Right key.
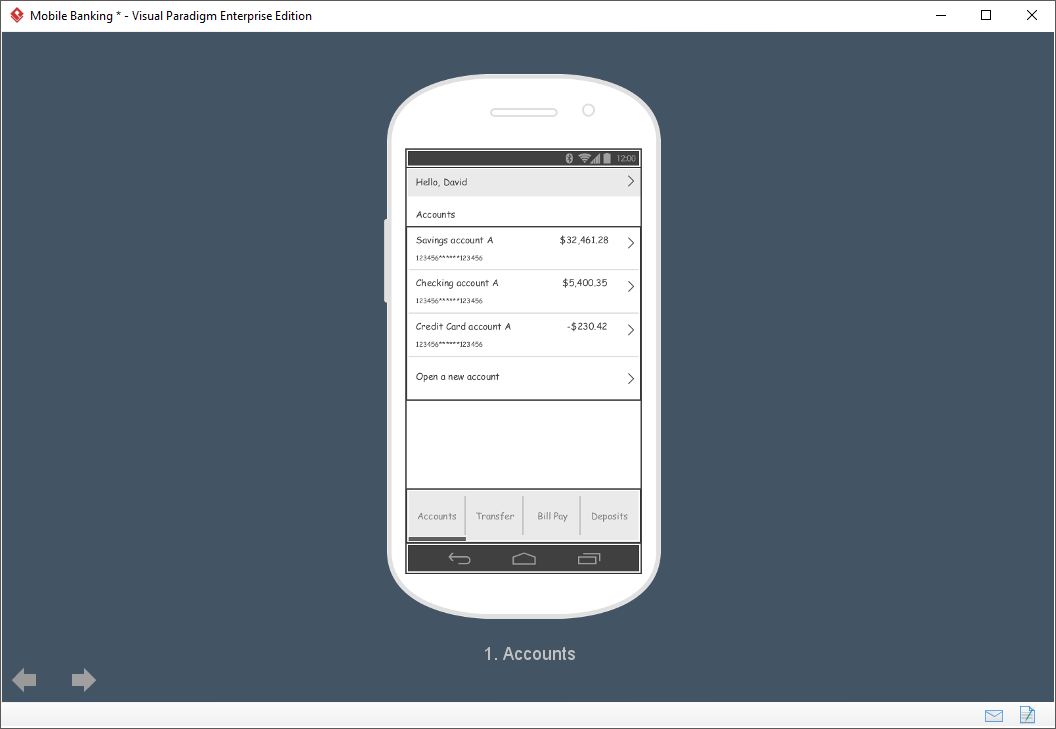
Note that by playing an animation as a storyboard slideshow, a new storyboard will be created, which can be opened under the storyboard feature by accessing Modeling > Storyboard from the toolbar. Storyboards created from Wireflow Diagram are read-only – You are not allowed to add additional wireframes into the storyboard.