Object diagram is a kind of UML diagram that shows a snapshot of instances of things in class diagram. Similar to class diagram, it shows the static design of system from the real or prototypical perspective.
Creating object diagram
Perform the steps below to create a UML object diagram in Visual Paradigm.
- Select Diagram > New from the application toolbar.
- In the New Diagram window, select Object Diagram.
- Click Next.
- Enter the diagram name and description. The Location field enables you to select a model to store the diagram.
- Click OK.
Creating instance specification
To create instance specification in object diagram:
- Select Instance Specification from the diagram toolbar.
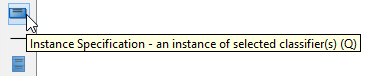
- Click on the diagram to create an instance specification shape. Name it.

Selecting classifiers
To specify classifiers for an instance specification:
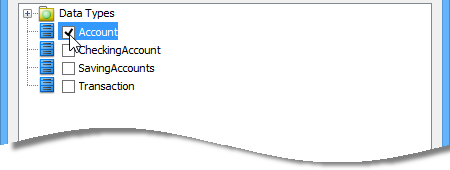
- Right-click on the desired instance specification shape and select Select Classifier > Select Classifier… from the pop-up menu.
- This opens the Classifiers tab. Click Add… in it.
- In the Select Classifier window, select the class(es) to be the classifier of the instance specification. If you are referencing another project, you can select its model element to be the classifier. Just change the from project selection at the top of the window.
- Click OK to return to the Instance Specification Specification window.
- Click OK to return to the diagram.

Defining slots
To define slots for an instance specification:
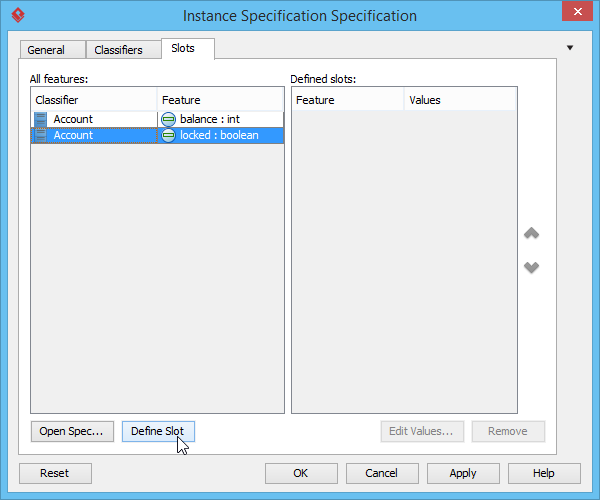
- Right-click on the desired instance specification shape and select Slots... from the pop-up menu.
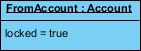
- The Instance Specification Specification window appears with the Slots tab selected. Select the features that you want to define slots on the left and click Define Slot.
- Select a defined slot and click Edit Values… at bottom right.
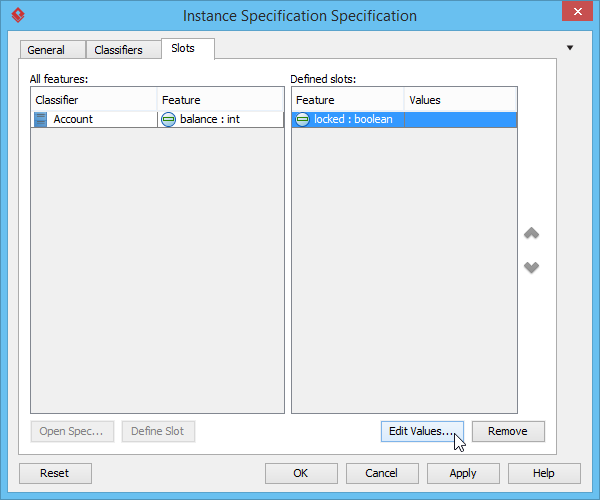
- The Slot Specification window pops out, the Values tab is opened by default. Click Add button and select Text from the pop-up menu.
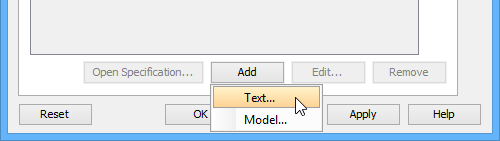
- Enter the slot value and click OK to confirm.
- Click OK again in the Instance Specification Specification window to return to the diagram.
Creating link
To create link between instance specifications:
- Move the mouse pointer over the source instance specification.
- Press on the Resource Catalog button and drag it out. Drag to the target instance specification and release the mouse button.

- Select Link from Resource Catalog. A link is created.
