A sequence diagram is a kind of UML diagram that is used primarily to show the interactions between objects that are represented as lifelines in a sequential order.
Creating sequence diagram
Perform the steps below to create a UML sequence diagram Visual Paradigm uml diagram tools.
- Select Diagram > New from the application toolbar.
- In the New Diagram window, select Sequence Diagram.
- Click Next.
- Enter the diagram name and description. The Location field enables you to select a model to store the diagram.
- lick OK.
Creating actor
To create actor, click Actor on the diagram toolbar and then click on the diagram.

Creating lifeline
To create lifeline, you can click LifeLine on the diagram toolbar and then click on the diagram.
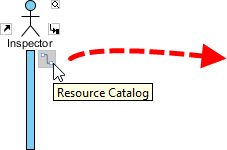
Alternatively, a much quicker and more efficient way is to use Resource Catalog:
- Move your mouse pointer over the source lifeline.
- Press on the Resource Catalog button and drag it out.
- Release the mouse button at the place where you want the lifeline to be created.
- Select Message -> LifeLine from Resource Catalog.
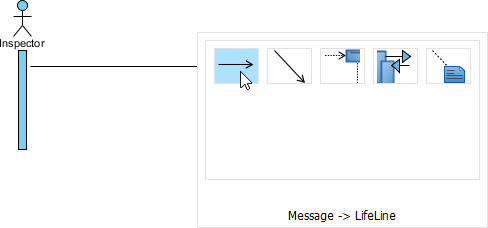
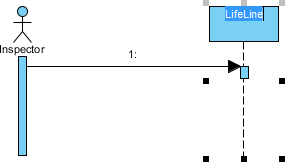
- A new lifeline will be created and connected to the actor/lifeline with a message. Enter its name and press Enter to confirm editing.
Auto extending activation
When create message between lifelines/actors, activation will be automatically extended.
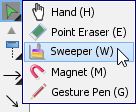
Using sweeper and magnet to manage sequence diagram
Sweeper helps you to move shapes aside to make room for new shapes or connectors. To use sweeper, click the Selector on the toolbar, then select Sweeper.
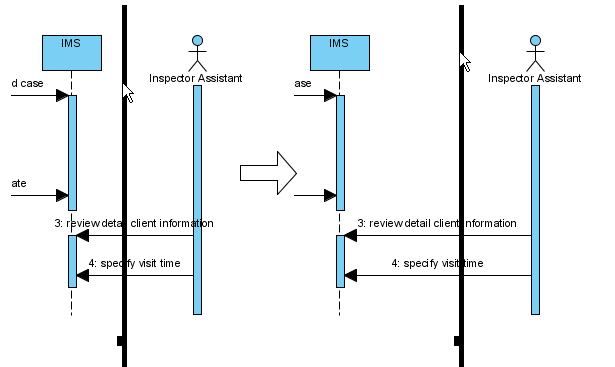
Click on empty space of the diagram and drag towards top, right, bottom or left. Shapes affected will be swept to the direction you dragged.
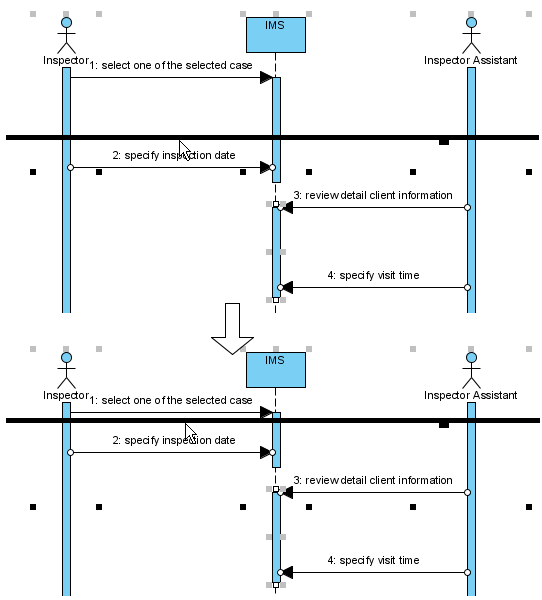
The picture below shows the actor Inspector Assistant is being swept towards right, thus new room is made for new lifelines.
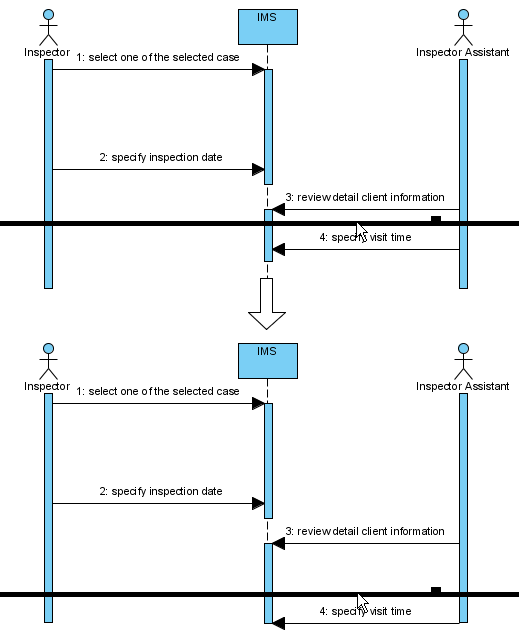
The picture below shows the message specify visit time is being swept downwards, thus new room is made for new messages.
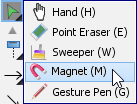
You can also use magnet to pull shapes together. To use magnet, click the Selector on the toolbar, then select Magnet.
Click on empty space of the diagram and drag towards top, right, bottom or left. Shapes affected will be pulled to the direction you dragged.
The picture below shows when drag the magnet upwards, shapes below dragged position are pulled upwards.
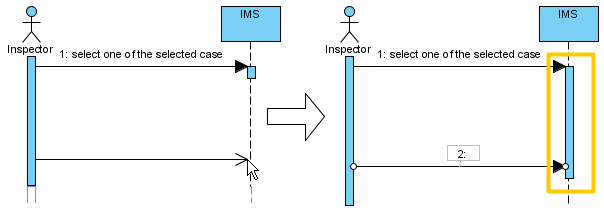
Creating combined fragment for messages
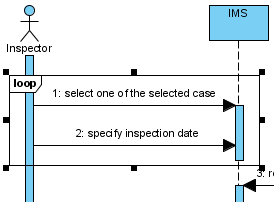
To create combined fragment to cover messages, select the messages, right-click on the selection and select Create Combined Fragment and then select a combined fragment type (e.g. loop) from the popup menu.

A combined fragment of selected type will be created to cover the messages.
Adding/removing covered lifelines
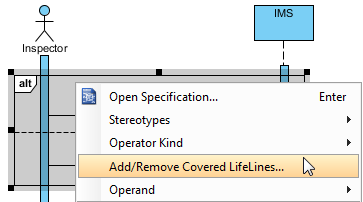
After you’ve created a combined fragment on the messages, you can add or remove the covered lifelines.
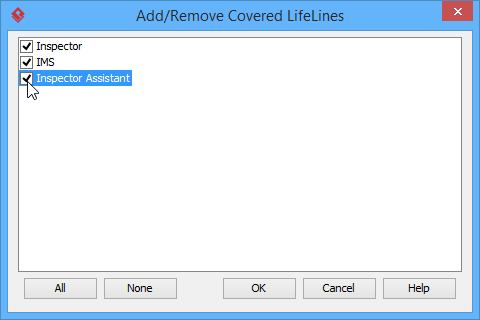
- Move the mouse over the combined fragment and select Add/Remove Covered Lifeline… from the pop-up menu.
- In the Add/Remove Covered Lifelines window, check the lifeline(s) you want to cover or uncheck the lifeline(s) you don’t want to cover. Click OK button.
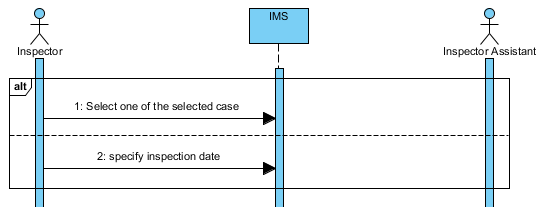
As a result, the area of covered lifelines is extended or narrowed down according to your selection.
Managing Operands
After you’ve created a combined fragment on the messages, you can also add or remove operand(s).
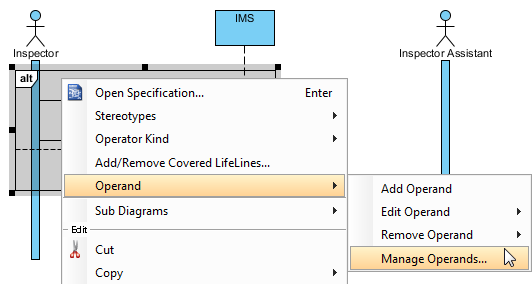
- Move the mouse over the combined fragment and select Operand > Manage Operands… from the pop-up menu.
- To remove an operand, select the target operand from Operands and click Remove button. Click OK button.
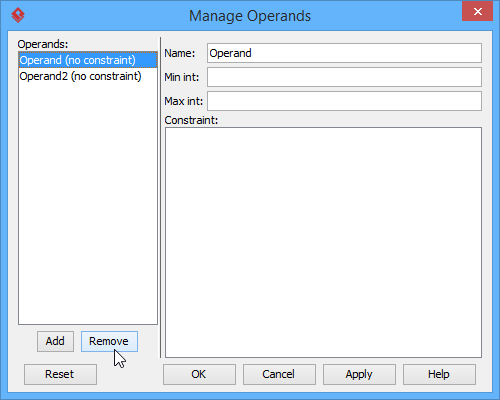
Otherwise, click Add button to add a new operand and then name it. Click OK button.
Developing sequence diagram with quick editor or keyboard shortcuts
In sequence diagram, an editor appears at the bottom of diagram by default, which enables you to construct sequence diagram with the buttons there. The shortcut keys assigned to the buttons provide a way to construct diagram through keyboard. Besides constructing diagram, you can also access diagram elements listing in the editor.
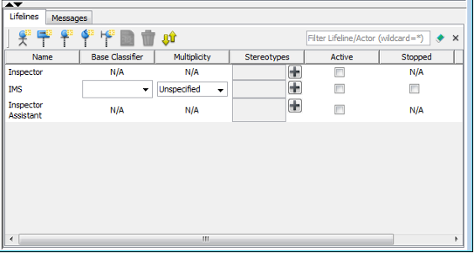
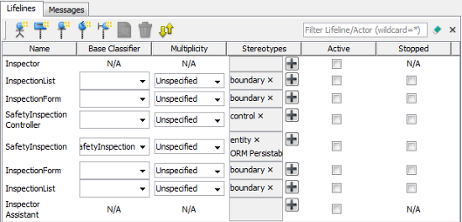
Editing lifelines
There are two panes, Lifelines and Messages. The Lifelines pane enables you to create different kinds of actors and lifelines.
| Button | Shortcut | Description |
|---|---|---|
| Alt-Shift-A | To create an actor | |
| Alt-Shift-L | To create a general lifeline | |
| Alt-Shift-E | To create an <<entity>> lifeline | |
| Alt-Shift-C | To create a <<control>> lifeline | |
| Alt-Shift-B | To create a <<boundary>> lifeline | |
| Alt-Shift-O | To open the specification of the element chosen in quick editor | |
| Ctrl-Del | To delete the element chosen in quick editor | |
| Ctrl-L | To link with the diagram, which cause the diagram element to be selected when selecting an element in editor, and vice versa |
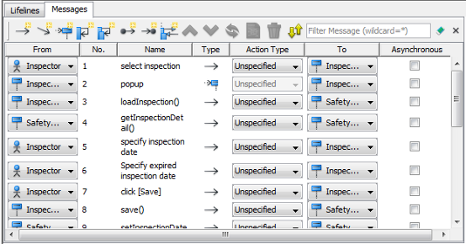
Editing messages
The Messages pane enables you to connect lifelines with various kinds of messages.
| Button | Shortcut | Description |
|---|---|---|
| Alt-Shift-M | To create a message that connects actors/lifelines in diagram | |
| Alt-Shift-D | To create a duration message that connects actors/lifelines in diagram | |
| Alt-Shift-C | To create a create message that connects actors/lifelines in diagram | |
| Alt-Shift-S | To create a self message on an actor/lifeline in diagram | |
| Alt-Shift-R | To create a recursive message on an actor/lifeline in diagram | |
| Alt-Shift-F | To create a found message that connects to an actor/lifeline | |
| Alt-Shift-L | To create a lost message from an actor/lifeline | |
| Alt-Shift-E | To create a reentrant message that connects actors/lifelines in diagram | |
| Ctrl-Shift-Up | To swap the chosen message with the one above | |
| Ctrl-Shift-Down | To swap the chosen message with the one below | |
| Ctrl-R | To revert the direction of chosen message | |
| Alt-Shift-O | To open the specification of the message chosen in quick editor | |
| Ctrl-Del | To delete the message chosen in quick editor | |
| Ctrl-L | To link with the diagram, which cause the message to be selected when selecting a message in editor, and vice versa |
Expanding and collapsing the editor
To hide the editor, click on the down arrow button that appears at the bar on top of the quick editor. To expand, click on the up arrow button.
Setting different ways of numbering sequence messages
You are able to set the way of numbering sequence messages either on diagram base or frame base.
Diagram-based sequence message
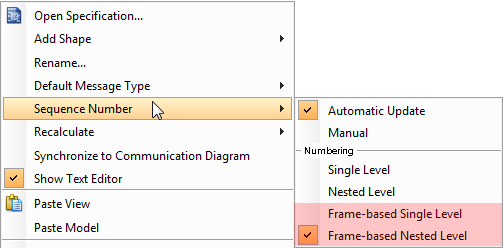
Right click on the diagram’s background, select Sequence Number and then either Single Level or Nested Level from the pop-up menu.

If you choose Single Level, all sequence messages will be ordered with integers on diagram base. On the other hand, if you choose Nested Level, all sequence messages will be ordered with decimal place on diagram base.
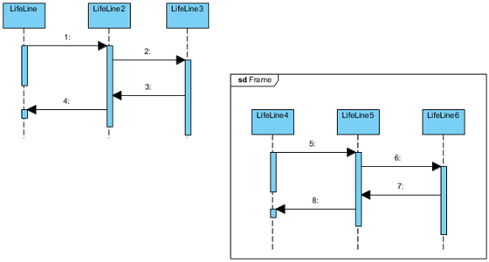
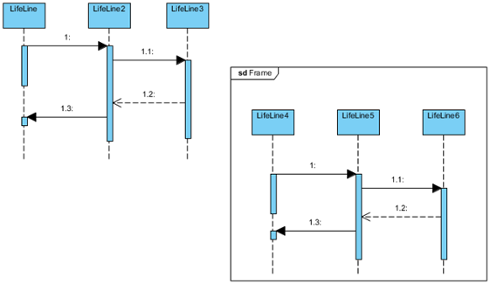
Frame-based sequence message
Right click on the diagram’s background, select Sequence Number and then either Frame-based Single Level or Frame-based Nested Level from the pop-up menu.
When you set the way of numbering sequence messages on frame base, the sequence messages in frame will restart numbering sequence message since they are independent and ignore the way of numbering sequence message outside the frame.