Sometimes, you may find the standard modeling notations not enough in supporting your domain specific needs. For example, if you are working on a project that relies heavily on the use of third-party libraries, you might want to specify in UML component diagram the API source of those components modeled. And in business process modeling, you might want to record the locations where the tasks are performed. Usually, these kind of specific needs cannot be directly supported by the standard notations.
Fortunately, OMG Unified Modeling Language (UML) introduces stereotype and tagged values, which provides designers with ideal solutions to these situations. Stereotype and tagged values are kind of extensibility mechanisms that allow designers to extend the vocabulary of UML in order to create new model elements. With the use of stereotype and tagged values, designers can introduce model elements with domain/problem specific properties.
Starting from UML 2.0, tagged values are considered to be attributes of stereotype. Yet, Visual Paradigm allows to use tagged values independently, that is, to add tagged values directly to model elements as custom properties instead of prior attachment to any stereotype. Besides, Visual Paradigm allows you to take the advantage of stereotypes and tagged values in not just UML but all the modeling notations like BPMN and even in ERD, DFD, etc. Simply put with Visual Paradigm, you can add custom properties to any model elements by creating tagged values.
There are several ways you can take to create tagged values to model elements. One is to create in a Grid. This method is extremely efficient when you want to add into and fill in the tags for multiple model elements in the same type. You will see how it works in this page.
Adding a new tag to model elements in grid
- Open the grid where the target model elements are listed or create a grid if necessary.
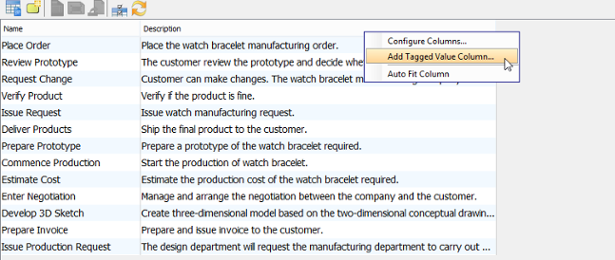
- Right click on the column header at the top of a grid and select Add Tagged Value Column… from the popup menu.

- Enter the tag name in the Input dialog box and click OK to confirm.
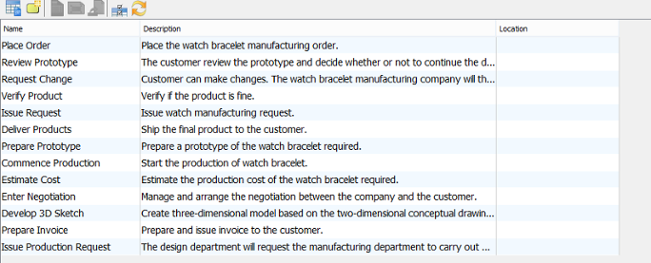
- You will see a new column appear in the last column of the grid.

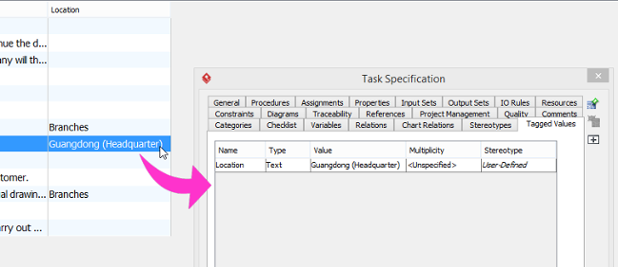
- Now, you can double click on a cell in that column to enter the value of the property (tag). When and only when you have entered a value, a tag will be added into that specific model element. Note that once a tag is added, you cannot remove the tag by clearing the cell content. If you want to remove the tag, you have to do it in the model element specification window.
