Doc. Composer provides a flexible way for you to create project documentation. All you need to do is to select your target model element/diagram, drag the elements template(s) from the Element Template Pane onto the document.
- Select project / diagram / diagram element / model element on Diagram Navigator / Model Explorer.
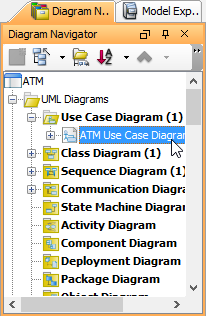
- Select the desired element template from the Element Template Pane and drop it/ them on the document.
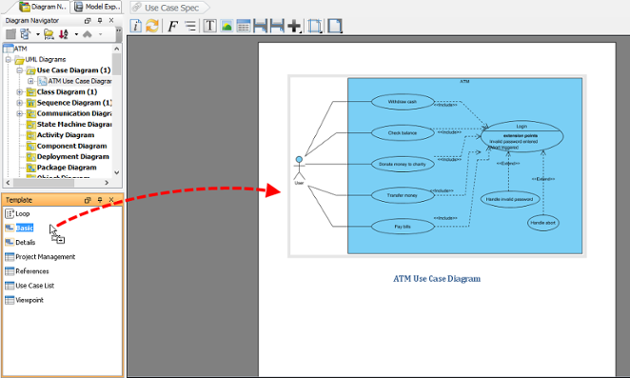
- Repeat the previous step to build the document.
Note: Instead of adding content element by element, you can select multiple elements at the same time to speed up the document creation process.
Editing Image
You can add diagram images into a document with the use of element template. For diagrams presented on a document, instead of showing the entire diagram you may want to have it focused on a specific part of a diagram. In order to achieve this, edit the image by taking the steps below.
- Click each image so that a bar will appear at the bottom of the image. You can edit the image through the bar. Initially, the whole diagram is displayed to fit the placeholder.
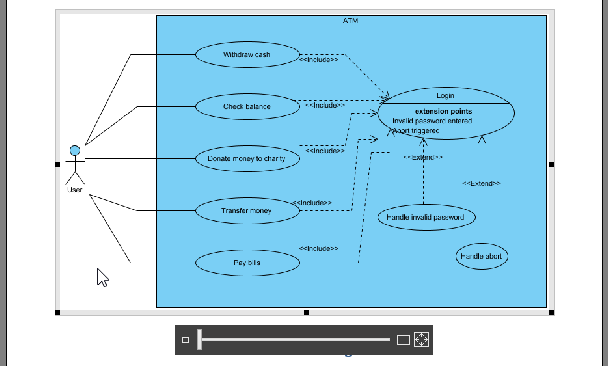
To zoom in the particular part of diagram, drag the slider to Zoom 100% (Actual Size).
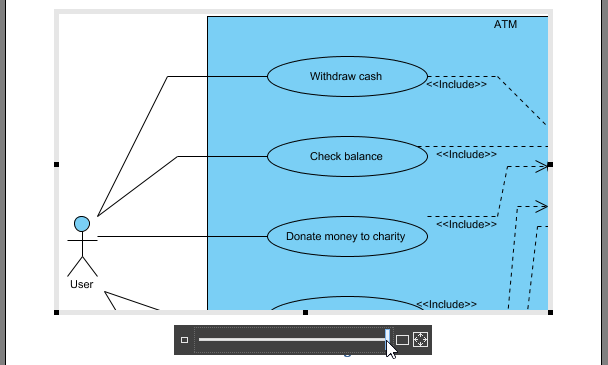
- To resize the image, drag the border of placeholder.

Notes:
- You can only edit the images produced by templates you dropped onto the document but not inserted images.
- The default setting of image on document is Disable Auto Fit Placeholder. Nevertheless, once you zoom or resize, it will turn to be Enable Auto Fit Placeholder automatically.
Working with diagram layers
The layer feature allows you to group diagram content into different logical layers. For example, you may create an annotation layer for explanatory purpose. Such a layer contains shapes like callout and note, but not the other shapes. Then when you want not to show the annotation shapes temporarily, you just need to hide the layer.
Doc. Composer supports diagram layers. You can select the diagram layer to or not to process when outputting content to a document. Let’s say if you need to produce a document for a business stakeholder, you may not want him to see the annotation shapes. What you have to do is to configure the layer filter by excluding the annotation layer. Doc. Composer engine will read the filter and not to process the annotation shapes.
To configure filter:
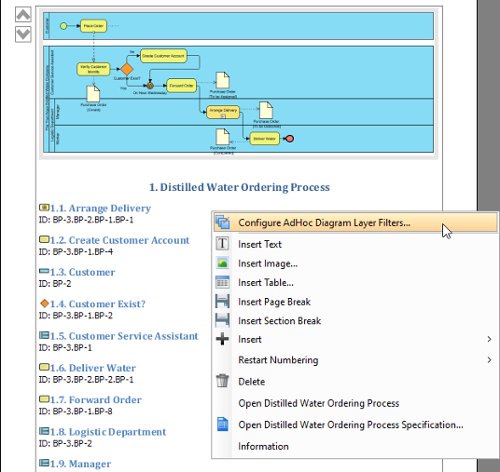
- Right click on a content block that involves processing diagram(s) and select Configure AdHoc Diagram Layer Filters… from the popup menu. Note that the word ‘diagram’ here is not restricted to ‘diagram image’. If a content block only involves listing the name of the shapes in a diagram, it is still processing a diagram.
- The diagrams being processed are listed in the Configure AdHoc Diagram Layer Filters window. For each diagram, select which layer to include in or exclude from processing. First, select the Filter Kind. There are four options.
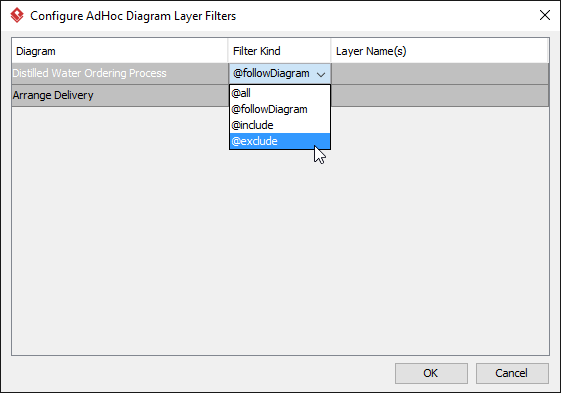
Filter Kind Description @followDiagram Follow the visibility of the layers set to the actual diagram. Layers that are set visible will be included here, likewise hidden layers will be excluded. Simply put, what you can see in the document will be exactly the same as the actual diagram. @all Include all diagram layers in processing. @include Select the layer(s) to process. @exclude Select the layer(s) not to process. - If you have selected @include or @exclude, select the layer(s) to include in or exclude from processing.
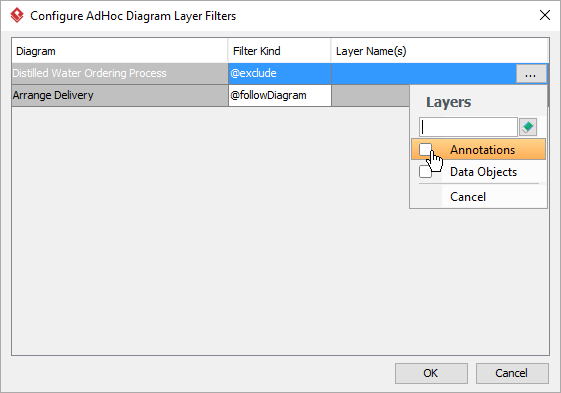
- Click OK. The document will be refreshed immediately to reflect the filter configuration.
Understanding the default template
Each type of project data has its own set of element templates and, among these templates, one of them is the default template.
Normally, we add content into a document by first selecting an element in Diagram Navigator or Model Explorer, and then dragging a template from the Element Template List onto a diagram. This works well but wouldn’t it be a bit faster if we can skip the template selection part? Default template was designed to serve this purpose. Besides dragging a template onto a document, you can also select a piece of project data in Diagram Navigator or Model Explorer, and then drag it directly onto the document to add content. If you do this, we will add content based on the default template of the selected element.
Default template is shown with its name bolded under the Element Template Pane, like the Basic template in the following image:
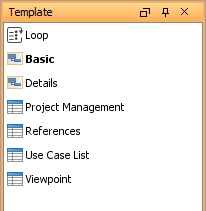
By default, the Basic template is chosen to be the default template. You can, however, set a user created template to be the default. Note that you can select either the Basic template, or any of the user created templates as default. You cannot select a built-in template as the default, except the Basic template.