Project Management Lifecycle Guide-through is a project management tool that assists your project team in managing your software development project through performing a set of management activities and producing the deliverables required in project definition, planning and control. In this article, you will learn how to get started with Project Management Lifecycle Guide-through and how to operate with this tool.
Creating a new Project Management project
As a good practice, it is recommended that you create a new project specialized for working with Project Management Lifecycle Guide-through. To create a new project, select Project > New from the main menu.
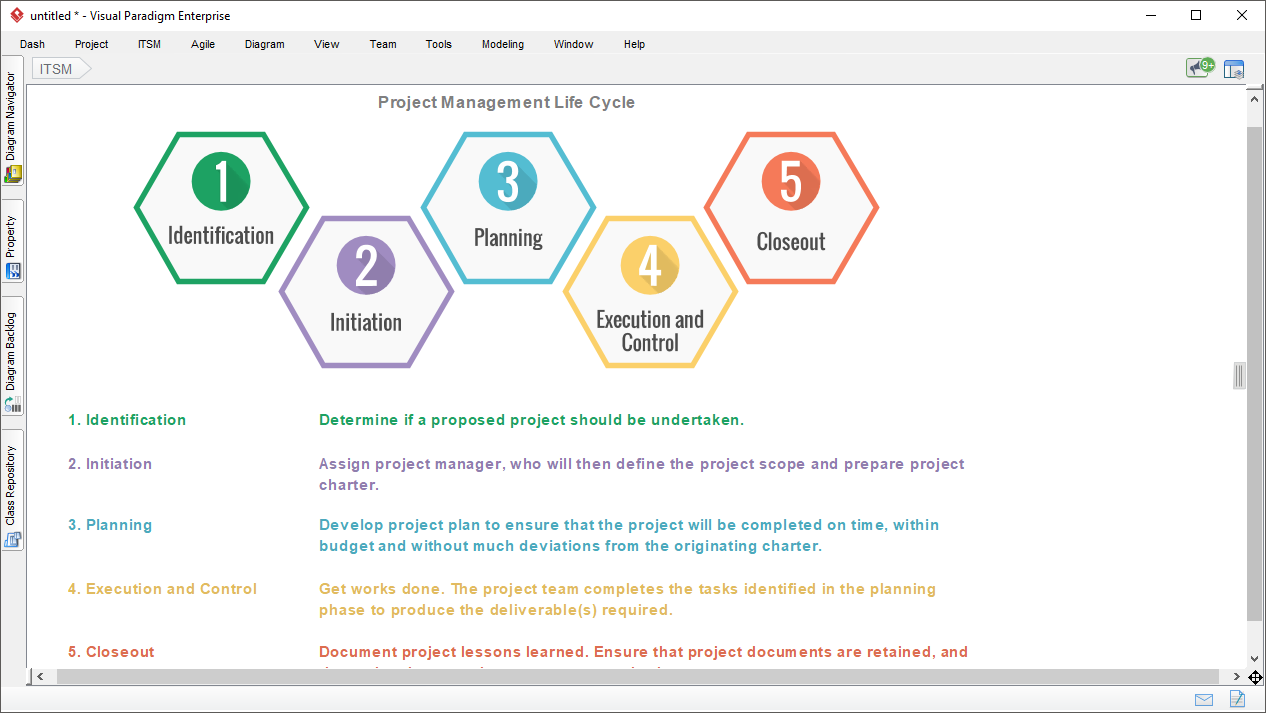
After that, select ITSM > Project Management Process from the application toolbar to create a new Project Management Lifecycle. You should then see the screen below.
Note that one project file can create at most one Project Management Lifecycle. If you want to create another Project Management Lifecycle, do it in another project, or in a new project.
Navigating through project management phases
You navigate through project management phases one by one to browse for and perform its activities. To open a project management phases, double click on it.
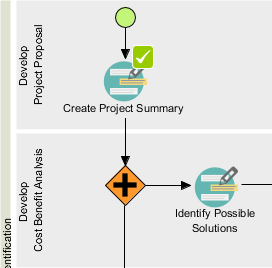
This opens a process diagram that contains the activities required under this phase. The figure below shows the content of the Preliminary phase.
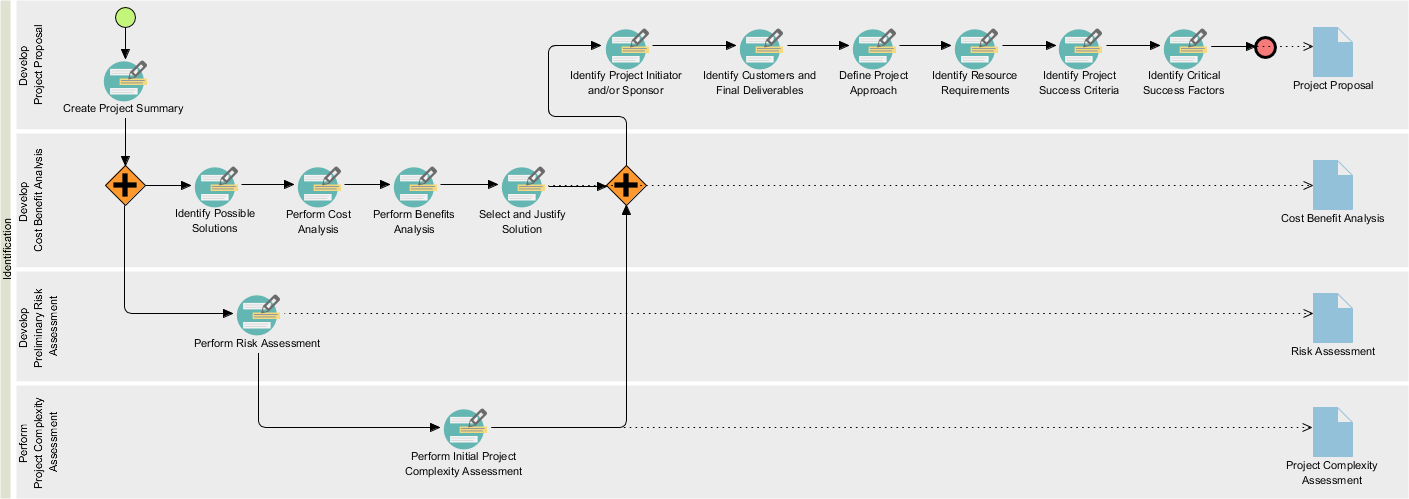
The process diagram contains two major components:
- Flow of activities: Each of the project management phases require you to perform some activities to create some deliverables. In the process diagram, the activities required to be performed are presented as a series of connected activity shapes. The arrow connectors represent the flow. It is important to follow the flow in performing the activities in order to properly complete the phase.
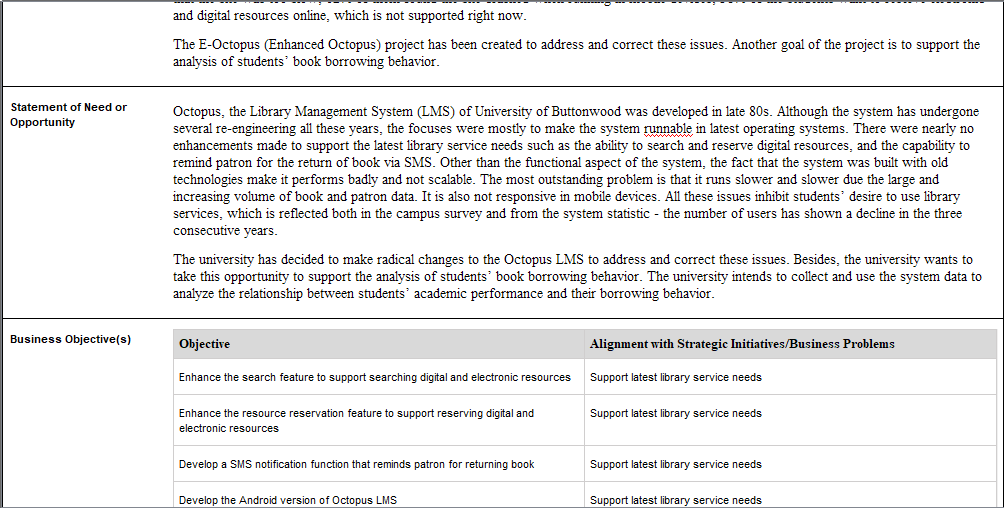
- Deliverables (lanes): The deliverables to be created under the phase are presented as horizontal lanes. Each deliverable (lane) contains the activities required to be completed in order to produce that deliverable. Take the Identification phase as example, the deliverable Cost Benefit Proposal can be produced by completing the 4 activities (From Identify Possible Solutions until Select and Justify Solution).
Performing an activity
An activity in a project management phase is a critical step of that phase. Completing all the activities in a phase signifies the completion of that phase.
Each project management activity requires you to perform certain actions, which are typically to draw a diagram or to fill in a form. Doing so creates the data required in forming a deliverable available in that phase.
To perform an activity:
- Double click on an activity to open it.
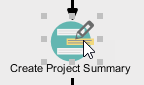
You will see a screen that looks like the one below.
Each activity is finished by completing the steps within, which are listed under the Overview section. The figure about shows an activity that contains two steps. - In order to help you successfully perform the actions required, we provide you with instructions and examples for all the steps. It is recommended to read through them before you perform any action. Expand the Instruction section to read it.
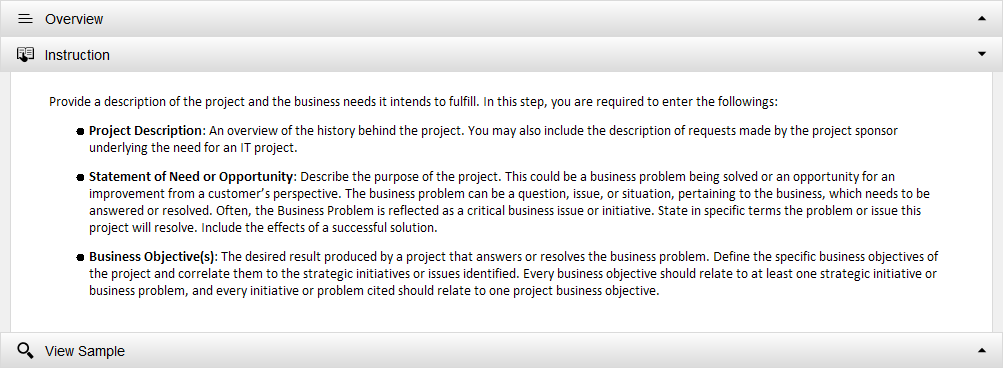
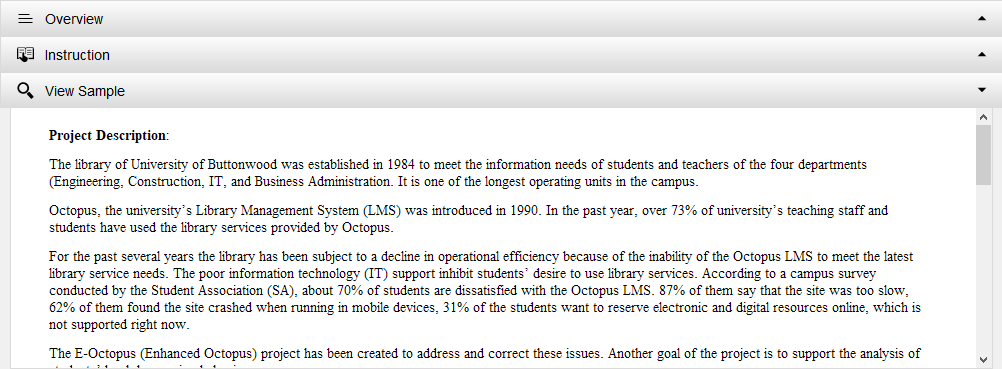
- Similarly, expand the View Sample section to read the sample.
- When you are ready, click on the action button listed in Perform Action section. It is not uncommon for a step to contain multiple actions. You must complete all actions listed.
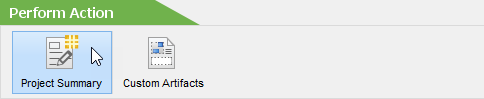
Besides actions, there is a button Custom Artifacts for you to include optional diagram or textual data into the step, which will be included in the deliverable to be produced. - Perform the action. Depending on the activity, you may be asked to draw a diagram, or to complete a form.
- When you are done, go back to the Activity screen via the breadcrumb.

- When all actions are done, the step is done. Click on Complete Step at the bottom right to confirm the completion.
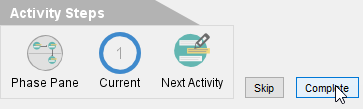
- Repeatedly complete the remaining steps. When all steps are done, the activity is done. You can then go back to the process diagram via the breadcrumb.

You can see a check mark next to a completed activity.